
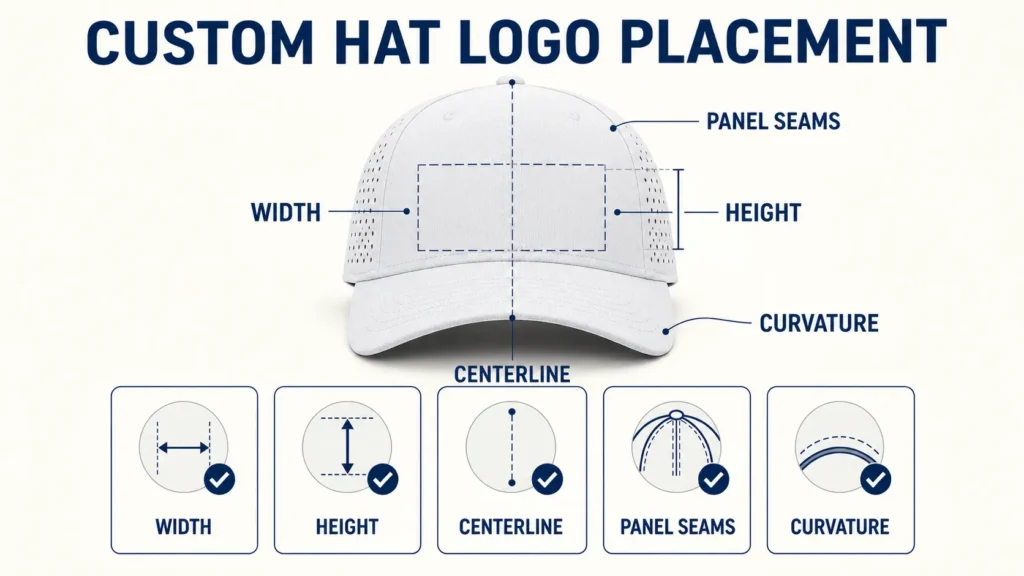
“Put the logo in the center” sounds clear until the sample arrives. The factory may center the artwork box while your designer is looking at the visible letters. A curved crown can make a level logo look low. A front seam can push small details apart. Then the team spends another sample round fixing a direction that was never measured.
A practical custom hat logo placement sheet removes that guesswork. It defines the logo size, the point being centered, the distance from a repeatable cap landmark, and the views required for approval.
Broad searches for custom hats with logo often focus on where a mark can go. A mature brand has a larger issue: consistency. One logo may need to work across several crown profiles, methods, colors, and production seasons without slowly moving, shrinking, or losing visual balance.
Logo placement is a three-dimensional decision
A cap is not a flat T-shirt panel. The crown curves around the head and changes shape when worn. The brim creates a strong visual line below the logo. Seams, eyelets, side panels, and the back opening limit the usable space. For this reason, a two-dimensional mockup is a starting point, not final proof.
Choose the cap construction before locking the mark. A six-panel front has a center seam; five-panel and seven-panel fronts can create different logo fields. Structured crowns hold a firm surface, while soft unstructured crowns move more with the head. See the options in JoinTop’s custom baseball hat construction guide.
Define finished artwork size, not file size
Write the finished width and height in millimeters. State whether the measurement covers the full artwork box, only the visible mark, or a main word without a small trademark line. Keep the approved art file name and version on the placement sheet.
Use vector art when available, plus a PDF preview. Adobe’s vector artwork overview explains why vector shapes are easier to scale without losing clean edges. Do not let a supplier measure a low-resolution screenshot that includes extra transparent space.
Use repeatable measurement points
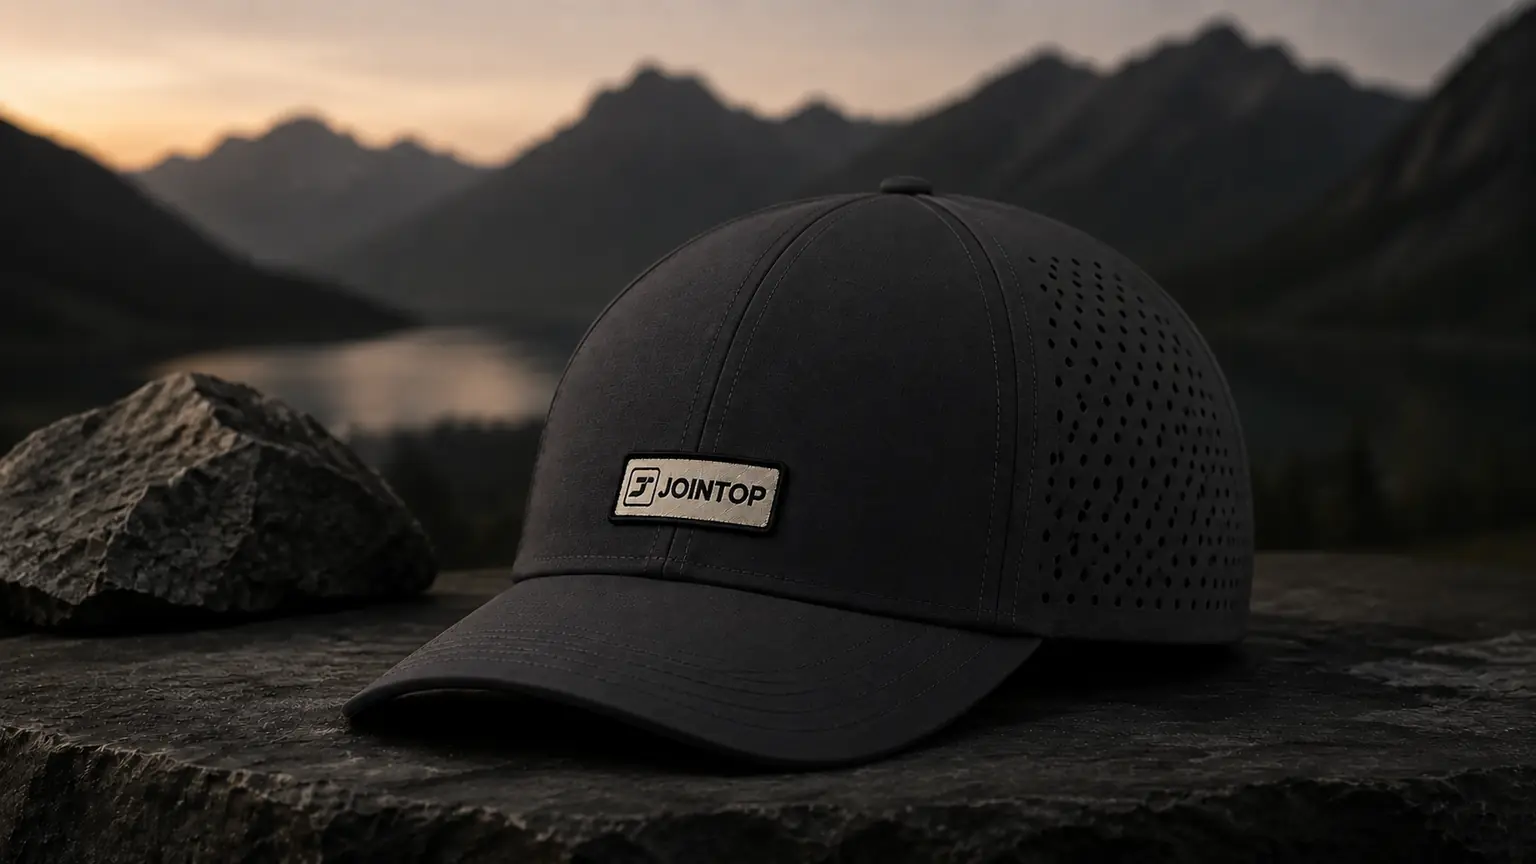
Pick landmarks that a sample room and inspector can find again. For a front logo, a common vertical reference is the bottom edge of the front panel or the closest seam above the brim. For a side logo, use named seams and the lower panel edge. For a back logo, define the relation to the center line, closure, and rear opening.
| Placement | Useful controls | Common mistake |
|---|---|---|
| Front | Logo width and height; center point; bottom gap; seam rule | Centering the file box instead of the visible mark |
| Wearer’s left or right | Distance from named seam and lower edge; level line | Mixing up wearer’s side and viewer’s side |
| Back above opening | Width; gap above opening; center line; closure clearance | Logo hidden when the cap is adjusted |
| Under brim | Distance from brim edge; orientation when brim is lifted | Artwork enters a high-stress stitch or fold area |
Always say “wearer’s left” or “wearer’s right.” A front-facing photo reverses the viewer’s reference. Add a simple arrow on the drawing.
State an allowed placement tolerance as well as the target. A target without a tolerance cannot guide an inspector, while an unrealistically narrow tolerance may not suit a curved, sewn product. Agree on a range the method and cap construction can hold, then judge production against the signed sample and measurement page.
Create placement families for every approved crown block
Do not force one placement number onto every cap in the line. A low six-panel performance cap, a high five-panel snapback, and an unstructured lifestyle cap do not present the same front area. Instead, create a small set of approved placement families tied to each crown block and logo application.
Each family should name the cap block, artwork version, finished size, visual center, target coordinates, allowed tolerance, decoration method, and signed sample. If several colors use the same placement, record them under one family. If a tonal logo or thick patch changes the apparent balance, approve it as a controlled variant rather than an informal exception.
For global or licensed programs, also check whether legal marks, local text, league rules, or sponsor positions change by market. Keep those artwork variants separate from manufacturing adjustments. This helps the brand see whether a difference was required by the market or introduced by production.
| Change | Keep the old approval? | Required action |
|---|---|---|
| Colorway only | Often, if contrast and material stay comparable | Confirm visual balance on the real color |
| Crown block or panel map | No automatic transfer | Recheck size, seam rule, and coordinates |
| Embroidery to patch | No | Approve edge clearance, curve, and attachment |
| Artwork or language change | No | Issue a new art and placement version |
Match the placement to the logo method
Flat embroidery, 3D puff, woven patches, silicone patches, and printing do not share the same limits. A patch has an edge and may need more space from a seam. 3D puff needs room for bold stitch shapes. Small flat embroidery can sometimes fit a side panel better than a thick patch. Review JoinTop’s hat logo technique guide before finalizing the size.
If a large logo must cross a six-panel center seam, ask for an early production review. Machine framing and seam thickness can affect the result. Tajima’s cap embroidery guidance shows why cap framing and sewing direction matter. A different panel structure, smaller artwork, patch, or split design may give a cleaner answer.
Approve optical centering as well as measured centering
Some marks are visually heavy on one side. A script tail or icon can make a mathematically centered box look off-center. Ask your designer to mark both the file center and the intended visual center. If they differ, put the approved offset in millimeters on the sheet.
Use a front photo taken straight on at crown height, not from above. Add left, right, and worn views. A logo that looks correct on a flat table may look too low when the sweatband opens the crown on a head. The worn view is especially important for high crowns, curved brims, and side marks.
Check color and legibility on the real cap
Placement cannot rescue a logo that is too small for its method. Inspect fine gaps, tiny text, registered trademark details, and contrast on the chosen fabric. Use a physical thread or material reference when color is important. Screen images are useful for discussion but should not be the only color approval.
For embroidery, approve a sew-out and the actual cap sample. For a patch, approve the patch edge, attachment stitch, and how the patch follows the crown curve. For print, check whether the image distorts across a seam or curved surface.
Create one controlled approval page
Keep the final page simple. List the cap style and color, artwork filename, method, finished size, exact measurements, color references, drawings, photo views, tolerance, version, and approval date. Mark items as Must Fix, Preferred, or Approved. If you need a repeatable feedback system, use the custom hat sample feedback guide.
Save the signed placement page with the approved sample and purchase order. It then becomes an inspection reference and a reorder control. If the logo or cap pattern changes later, issue a new version rather than editing the old file without a record.
Use production evidence to protect the approved look
Before bulk sewing, compare an early decorated cap with the signed placement master. Use the same front, side, and worn photo views used during approval. The check should confirm position, size, level, seam relation, and the visible shape of the mark. A ruler alone cannot catch an optical shift; a photo alone cannot prove the target measurement.
Define who may approve a deviation. If production material or crown shape makes the original position look wrong, the factory should not quietly “improve” it. Show the difference, explain the cause, and get a recorded decision from the brand owner. That same decision must reach the tech pack, inspection sheet, and purchase order.
For a reorder, start from the last approved production reference rather than a marketing image. Confirm that the crown block, artwork, digitizing or mold, decoration method, and measurement page are still current. This is how a placement system becomes a brand asset instead of a one-sample instruction.


 English
  German
  Spanish
  French
  Amharic
  Portuguese
  Italian
  Swedish
  Turkish
  Belarusian
  Danish